
The starting direction of your putt is almost entirely dictated by the putter’s face angle at impact, not your stroke path.
- Technology choices like insert vs. milled faces and groove patterns directly influence how the ball leaves the putter face.
- Matching your putter’s balance (toe hang vs. face-balanced) to your natural stroke arc is critical for a consistently square face.
Recommendation: Stop blaming your stroke path and start diagnosing how your equipment and setup influence your putter face angle at the moment of truth.
You read the green perfectly. You see the line. You start the putter back on a smooth path, and yet, the ball slides just past the right edge or pulls just left. For the golfer who consistently misses putts despite having a good eye, this experience is a recurring source of immense frustration. The common advice is to practice your stroke path, to “keep the putter head on a track.” You might even be told to get a new putter with a different alignment aid. These are surface-level fixes for a much deeper, more microscopic issue.
The hard truth, supported by extensive analysis, is that the path of your putting stroke is a minor character in the story of a made or missed putt. The hero, or villain, is the putter face angle at the exact millisecond of impact. This is not a matter of opinion; it is a matter of physics. The subtle interplay between the technology in your putter head, your personal visual preferences, and the unseen mechanics of your stroke arc conspire to determine whether that face is square, open, or closed at impact. Understanding this relationship is the key to unlocking true putting consistency.
But what if the problem isn’t your ability to aim, but rather that your equipment is subconsciously fighting your natural tendencies? This guide abandons the generic advice. Instead, we will dissect the critical, often-overlooked components that dictate face angle. We will explore the DNA of your putter—from face technology to balance—and show you how to build a system where a square face at impact becomes an automatic outcome of your stroke, not a hopeful accident. This is where you stop guessing and start diagnosing.
This article provides a structured breakdown of the elements that truly control your putting accuracy. By exploring each component, you will gain a diagnostic-level understanding of your own putting, enabling you to make informed adjustments and finally see your well-read lines convert into made putts.
Summary: The Definitive Guide to Mastering Putter Face Angle
- Soft Insert or Milled Steel: Which Face Tech Gives You Better Distance Control?
- Lines vs Dots: Which Visual Aid on the Putter Head Fits Your Eye?
- Face Balanced or Toe Hang: Which Putter Matches Your Stroke Arc?
- Roll Tech: Do Face Grooves Really Get the Ball Rolling Sooner?
- 3 Degrees of Loft: Why You Need Loft on a Putter to Avoid Bouncing?
- What Is a Stimpmeter and How Does It Dictate Your Pace on the Green?
- Seeing the Line: How to Trust Your Read When the Pressure Is On?
- How to Adjust Your Putting Stroke When Green Speed Changes drastically?
Soft Insert or Milled Steel: Which Face Tech Gives You Better Distance Control?
The choice between a soft insert and a solid milled steel face is often framed as a preference of “feel,” but its impact on performance is far more scientific. The core difference lies in feedback and energy transfer. A milled steel face provides direct, unfiltered auditory and tactile feedback. The crisp “click” translates impact purity directly to your senses, allowing a skilled player to minutely adjust their stroke for distance. However, this directness is unforgiving; mishits lose a significant amount of energy, resulting in putts that come up well short.
Conversely, a soft insert face, typically made from a polymer or elastomer, acts as a dampener. It mutes sound and feel, which some players find less responsive. Its primary benefit, however, is a higher coefficient of restitution (COR) across the face. This means off-center strikes—minor misses toward the heel or toe—retain a much higher percentage of their initial energy. The ball speed remains more consistent, leading to better distance control for players who don’t always find the dead center of the putter. The fundamental trade-off is precision feedback (milled) versus forgiveness (insert). According to putting analysis, this matters because 90% of the initial ball direction is determined by face angle, and consistent energy transfer helps maintain that angle through impact.
Action Plan: Diagnosing Your Ideal Putter Face
- Test both putter types on the practice green to identify which provides better feedback for your stroke.
- Pay attention to the sound at impact – milled putters produce a crisp click while inserts offer a muted thud.
- Notice distance control on mishits – insert putters typically maintain better speed on off-center strikes.
- Consider green conditions – milled faces often perform better on slower winter greens while inserts excel on fast summer surfaces.
- Evaluate the ‘smash factor’ consistency across the face using impact tape to see which technology suits your strike pattern.
Ultimately, selecting the right face technology is the first step in building a repeatable system for distance control, which is the foundation for allowing your face angle to do its job.
Lines vs Dots: Which Visual Aid on the Putter Head Fits Your Eye?
The alignment aid on your putter is not merely a cosmetic feature; it is a critical interface between your brain’s visual processing system and the putter face. The effectiveness of a line, a dot, or no aid at all is highly individual. The common mistake is assuming that a longer, more prominent line is universally better. For some golfers, this is true. They are ‘Line Matchers,’ who perceive the target line as a track and excel at placing the putter’s alignment line parallel to it. This method provides a clear, geometric confirmation of alignment before the stroke begins.
However, another group of golfers are ‘Target Pointers.’ These players’ brains work differently; they subconsciously aim the putter face itself, much like pointing a finger. For them, a long line can be a distraction, creating a visual conflict between the line and the top edge of the putter. These golfers often perform significantly better with a single dot, two small dots framing the sweet spot, or even a completely blank putter crown. These minimal aids allow them to focus on the whole of the putter face and its relationship to the target, rather than getting bogged down in matching up lines.
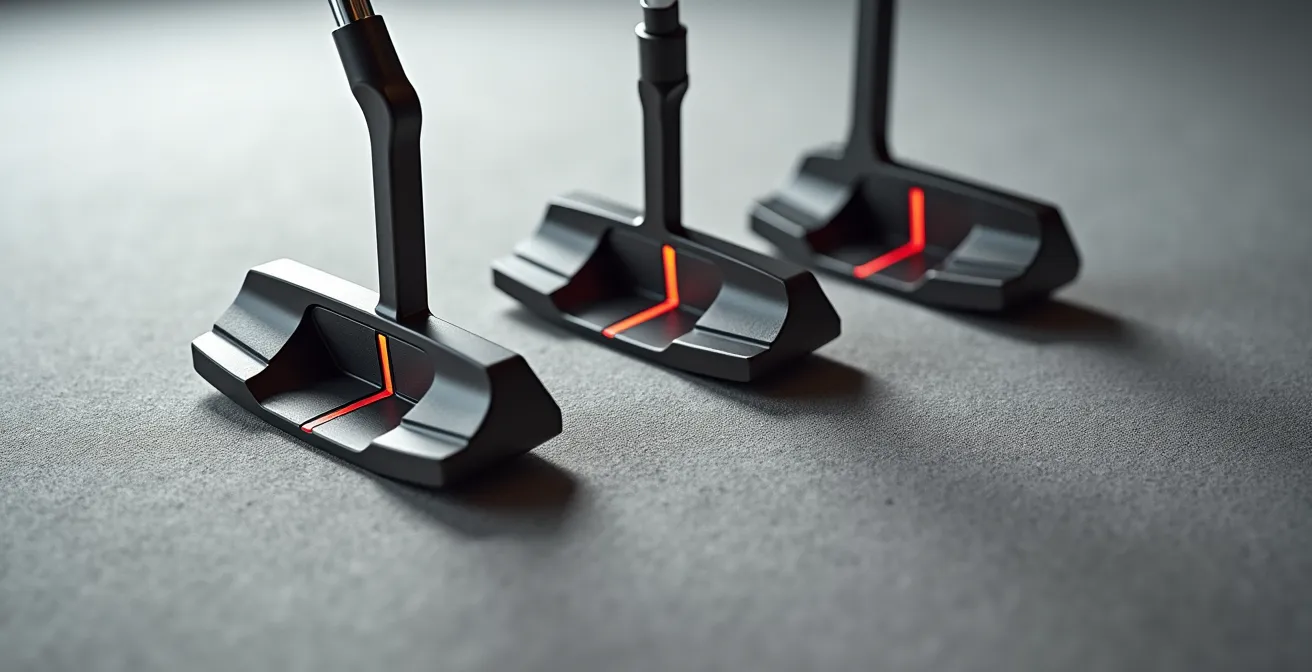
As the image above illustrates, the visual presentation of these aids is starkly different. The choice is not about which is “better,” but which one quiets your mind and allows for confident alignment. In one analysis, golfers who switched to an alignment aid that matched their visual processing type saw a remarkable improvement. This is not about aesthetics; it’s about neuro-compatibility.
Case Study: Professional Alignment Techniques
PGA Professional Daniel Gray’s research reveals two distinct visual processing types among golfers: ‘Line Matchers’ who excel with long alignment lines parallel to target, and ‘Target Pointers’ who perform better with dots or minimal aids. In testing with amateur golfers, those who switched to alignment aids matching their visual type improved face angle consistency by up to 1.5 degrees, significantly reducing missed putts inside 10 feet.
Identifying your own “visual processing type” is a crucial diagnostic step. Experimenting with different aids can reveal a hidden key to unlocking a more consistent and trustworthy setup.
Face Balanced or Toe Hang: Which Putter Matches Your Stroke Arc?
The concept of putter balance is one of the most misunderstood, yet critical, elements in matching a putter to a golfer. It refers to how the putter head hangs when balanced on a finger. A ‘face-balanced’ putter will have its face point directly to the sky. This design has minimal ‘toe hang’ and is engineered to resist rotation. It is best suited for a golfer with a “straight back, straight through” stroke, where there is very little natural arc and minimal face rotation.
On the other hand, a putter with ‘toe hang’ will have its toe point towards the ground to varying degrees (slight, moderate, or strong). This design is built to work with a stroke that has a natural arc—swinging slightly inside on the backstroke, squaring at impact, and moving back inside on the follow-through. The toe hang helps the putter face naturally open on the backswing and close through impact, synching up with the player’s arc. Using the wrong balance for your stroke forces subconscious manipulations. A player with a strong arc using a face-balanced putter will have to actively fight to close the face, often leaving it open and missing right. Conversely, a straight-stroke player using a toe-hang putter will often over-rotate and pull putts left.
As the experts at Modern Golf Canada point out, the fit is paramount. They note that, for a specific type of stroke, the putter’s design must be a match:
Golfers with less arc and face rotation generally fit into a plumber’s neck model putter. These putters generally suit strokes with minimal arc and face rotation.
– Modern Golf Canada, Face the Facts in Putting: Controlling Face Angle
Understanding this relationship is crucial. The following table breaks down how different toe hang angles correspond to stroke types and their likely miss patterns when mismatched, based on a detailed guide on matching putter balance.
| Toe Hang Angle | Best For Stroke Type | Face Rotation Rate | Common Miss Pattern |
|---|---|---|---|
| Face Balanced (0°) | Straight back-straight through | Minimal (< 3°) | Pushes when timing is off |
| Slight (20-30°) | Minimal arc | Low (3-5°) | Occasional pulls |
| Moderate (45°) | Natural arc | Medium (5-8°) | Balanced misses |
| Strong (70°+) | Strong arc | High (> 8°) | Pulls when rushed |
Matching your stroke arc to the putter’s inherent design is not a marginal gain; it is a foundational requirement for a repeatable, square impact position.
Roll Tech: Do Face Grooves Really Get the Ball Rolling Sooner?
The technology of putter face grooves is designed to solve a singular, microscopic problem at impact: skidding. When a putter strikes a golf ball, the ball initially skids or even hops for a short distance before it begins to roll end-over-end. This initial skidding phase is inconsistent and susceptible to small imperfections on the green, potentially deflecting the ball off its intended line. Groove technology aims to minimize this phase by grabbing the back of the ball at impact and imparting topspin, encouraging a true forward roll almost immediately.
Different manufacturers use various patterns—horizontal, descending loft, or intricate milling—but the goal is the same: to create friction and lift the ball into a stable roll. Does it work? High-speed camera analysis confirms that grooved faces do, in fact, reduce the initial skid and launch the ball with more topspin than a smooth, non-grooved face. This quicker transition to a true roll means the ball is less affected by turf inconsistencies in the first few feet of its journey, which is where many putts are lost. A ball that is rolling truly is more likely to hold its line, especially on faster greens where the slightest deviation is magnified.
The importance of a true roll is amplified when you consider the tiny margins for error. A Quintic Ball Roll analysis demonstrates that a 2-degree open face from just 5 feet will result in a missed putt. A ball that is skidding and bouncing is more likely to be influenced by an imperfect face angle than one that is rolling stably from the start. Grooves help stabilize the roll, giving your correctly-aimed face angle the best possible chance to succeed.
Action Plan: Testing Groove Effectiveness for Consistent Roll
- Mark a line around your golf ball to observe roll quality – grooved faces should produce less wobble.
- Test off-center hits toward heel and toe to evaluate groove forgiveness across the face.
- Compare roll distance on mishits between grooved and smooth faces using impact tape.
- Evaluate performance on wet greens where grooves channel moisture away from impact zone.
- Monitor initial ball launch using slow-motion video to verify forward roll versus skid.
While not a magic bullet, optimizing the initial roll is a critical piece of the putting puzzle, ensuring that your perfectly aimed putt starts and stays on line.
3 Degrees of Loft: Why You Need Loft on a Putter to Avoid Bouncing?
It seems counterintuitive to have loft on a club designed to roll the ball along the ground. However, a small amount of loft—typically between 2 and 4 degrees—is essential for a proper putt. The reason is that a golf ball doesn’t sit perfectly on top of the grass; it settles down into the turf, creating a small depression. A putter with zero or negative loft would strike the ball on its equator or slightly below, driving it down into the turf. This causes the ball to hop or bounce initially, killing speed and sending it offline.
The purpose of putter loft is to lift the ball out of its depression and onto the surface of the green at the moment of impact. The ideal impact creates a gentle launch that is immediately followed by a true forward roll. The standard 3-4 degrees of loft is a baseline, but the optimal loft for any given golfer is dependent on their individual “angle of attack” (AoA)—whether they hit slightly up, level, or slightly down on the ball.

As depicted in the side-on view, the loft ensures the initial contact promotes lift rather than a downward drive. A golfer with a positive AoA (hitting up on the ball) may deliver too much “dynamic loft” at impact and require a putter with less static loft. Conversely, a golfer with a negative AoA (hitting down) will need more static loft to counteract this and prevent the ball from being driven into the green.
Case Study: Dynamic Loft and Angle of Attack
Analysis of putting strokes reveals that static loft (typically 3-4 degrees) must be adjusted based on individual angle of attack. Golfers with a positive angle of attack (hitting up) may need less static loft, while those with negative attack angles require more. Testing showed that incorrect loft matching leads to subconscious compensations, causing face angle manipulation that increases misses by up to 30% on 10-foot putts.
Getting your dynamic loft right at impact is a non-negotiable step to eliminate bouncing and ensure the ball starts on a stable, predictable roll.
What Is a Stimpmeter and How Does It Dictate Your Pace on the Green?
The Stimpmeter is a simple but ingenious device—a 36-inch aluminum bar with a V-shaped groove—used to measure the speed of a putting green. A ball is placed in a notch that releases it when the bar is raised to a specific angle (approximately 20 degrees). The distance the ball rolls on a flat section of the green, averaged from rolls in opposite directions, gives the ‘Stimp’ reading in feet. A reading of 7 is considered slow, while 11 is fast, and major tournament greens can reach 13 or higher. This number provides an objective measure of green speed, dictating everything about a golfer’s approach to putting for that day.
The evolution of green speeds has been dramatic. Data on USGA Stimpmeter adoption reveals that only 2% of courses had speeds over 9.0 feet in 1978, whereas today, speeds of 10-12 feet are commonplace at well-maintained clubs. For the player, this has a profound effect. A faster green not only requires a shorter, gentler stroke for the same distance but also magnifies the consequence of any error. An open putter face of just 1 degree on a slow green might miss by an inch, but on a fast, tournament-speed green, that same error could cause the putt to miss by 4 or 5 inches. The Stimpmeter reading, therefore, doesn’t just tell you how hard to hit the ball; it dictates the level of precision required to be successful.
The following table, based on Keiser University College of Golf data, illustrates how the penalty for face angle error increases as green speed rises.
| Stimp Reading | Speed Category | Typical Venue | 1° Face Error Impact (10 ft putt) |
|---|---|---|---|
| 7-8 feet | Slow | Public courses | Miss by 1-2 inches |
| 9-10 feet | Medium | Private clubs | Miss by 2-3 inches |
| 11-12 feet | Fast | Championship venues | Miss by 3-4 inches |
| 13+ feet | Tournament | Major championships | Miss by 4+ inches |
Knowing the Stimp reading is the first step; learning how to adjust your stroke length and mental expectations to that speed is the key to mastering pace and, by extension, making more putts.
Seeing the Line: How to Trust Your Read When the Pressure Is On?
Trusting your read is less a physical act and more a mental discipline. You can have a perfect read of the break, but if you allow doubt to creep in during the final seconds before your stroke, your body will inevitably try to “correct” or “guide” the putt. This subconscious manipulation is the primary cause of a decelerating stroke and a wobbly, often open, putter face at impact. The key to performing under pressure is to create a rigid separation between the ‘reading’ phase and the ‘execution’ phase.
Once you have surveyed the putt from all angles and committed to a line, that decision must be final. The execution phase should be purely athletic and reactive, focused only on two things: starting the ball on your chosen intermediate target and maintaining a consistent tempo. Visualizing a specific entry point on the lip of the cup—like the “7 o’clock” position—is far more effective than just aiming at the general hole. It transforms the target from a vague area to a precise point, simplifying the task for your brain. This level of commitment short-circuits the analytical part of your brain that produces doubt.
The feeling of pressure often leads to a critical physical flaw. As noted in research on the psychology of the sport:
Under pressure, the common unconscious tendency is to decelerate the putter through impact to gain control. Deceleration is a primary cause of an unstable and open putter face.
– Golf Psychology Research, Pressure Putting Analysis
To combat this, your pre-shot routine must be a fortress of commitment. It’s not about trying harder; it’s about trusting the work you’ve already done.
Action Plan: Pre-shot Routine for Commitment Under Pressure
- Create a hard mental stop between reading phase and execution phase – once decided, no second-guessing.
- Focus solely on starting the ball on your intended line rather than ‘making’ the putt.
- Visualize a specific entry point to the hole (like ‘7 o’clock’) instead of just the general target.
- Maintain consistent tempo by counting ‘1-2’ during backstroke and forward stroke.
- Commit to accelerating through impact regardless of pressure – trust your initial read completely.
Ultimately, trusting your read is an act of letting go. You must trust your preparation and allow your athletic instincts to take over, free from the interference of last-second doubt.
Key takeaways
- Your putter’s balance (toe hang) must match your stroke’s natural arc to prevent subconscious face manipulation.
- Green speed, measured by a Stimpmeter, fundamentally changes the precision required; faster greens magnify every error in face angle.
- Trusting your read under pressure is a mental skill; you must commit to your line and accelerate through impact to avoid the fatal flaw of deceleration.
How to Adjust Your Putting Stroke When Green Speed Changes drastically?
The most common and destructive mistake golfers make when adjusting to different green speeds is consciously trying to alter their putting stroke mechanics. They attempt to “hit” the ball harder for slow greens or “ease up” for fast greens. This conscious manipulation destroys tempo and is a primary cause of an unstable putter face at impact. The correct method for adjusting to drastic speed changes involves recalibrating your brain’s internal “speedometer” while keeping your core mechanics and tempo absolutely consistent.
The focus should shift from mechanical thoughts to a purely feel-based approach centered on the target. Instead of changing your stroke, you change the *length* of your stroke naturally, as a subconscious response to the distance of the target. Drills like the “Ladder Drill” are exceptionally effective for this. By putting to various distances in a structured sequence, you force your brain to quickly learn the relationship between stroke length and ball roll-out on that specific green, without a single thought about mechanics. Another advanced technique is to use sound as a calibration tool. By maintaining an identical tempo (a metronome app is useful for this), you learn to associate a “firmer click” at impact with longer putts on slow greens and a “softer click” for short putts on fast greens.
Case Study: The Ladder Drill for Speed Calibration
Tour professionals use the ‘Ladder Drill’ to quickly adapt to new green speeds without changing mechanics. Starting at 10 feet, they putt to distances of 20, 30, and 40 feet, then reverse the sequence. This drill recalibrates the brain’s internal speedometer in under 10 minutes. Testing shows players who use this method before rounds reduce three-putts by 40% compared to those who only hit random practice putts.
By trusting your subconscious to regulate stroke length and focusing only on tempo and target, you can adapt to any green speed without sacrificing the square putter face you’ve worked so hard to achieve.